
HOW TO
STEP 01: REMOVE ALL AIR FROM THE CHAMBER.
Locate the red oral inflation tube on the device where you would manually inflate it. Remove the black cap, invert it into the oral inflation tube, and hold it to release air. Squeeze or roll the inflated chamber until all of the air is expelled. Once the air has been expelled through the tube, replace the cap to its original position.
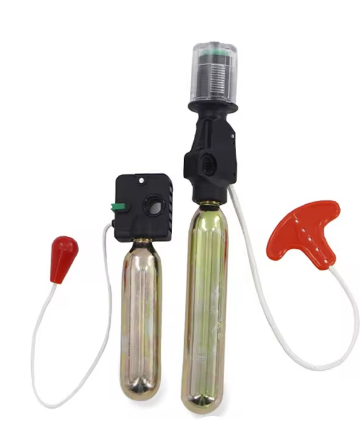
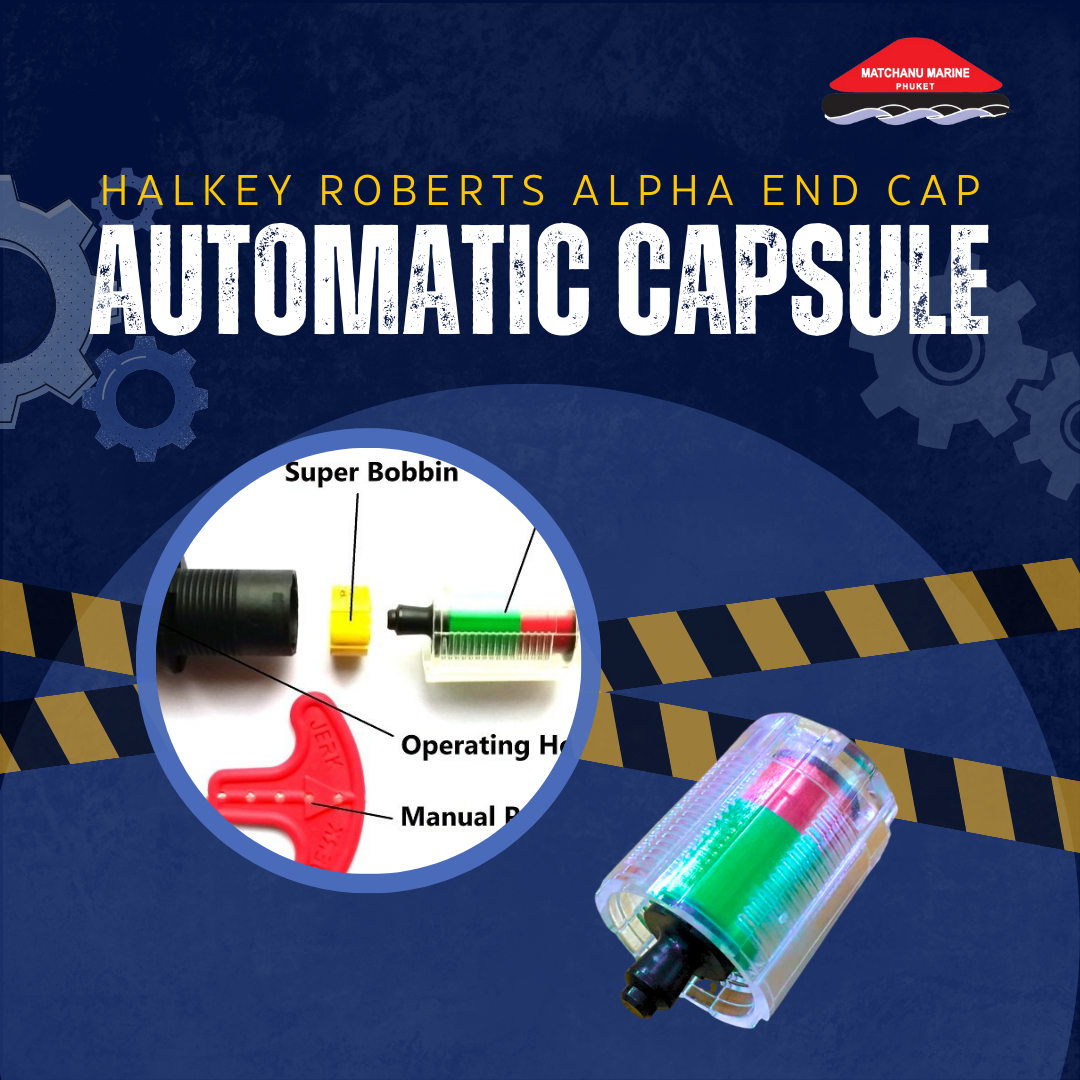
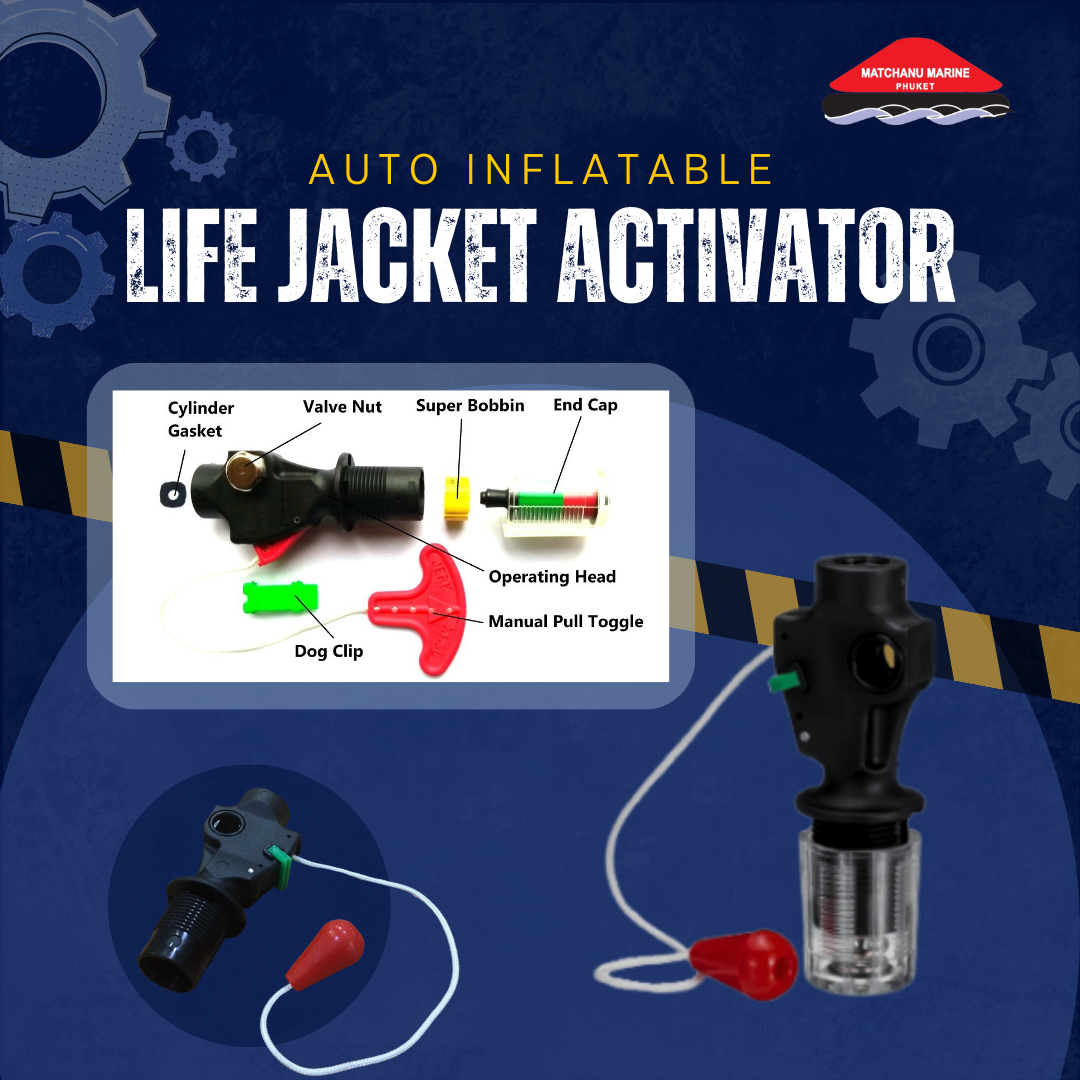
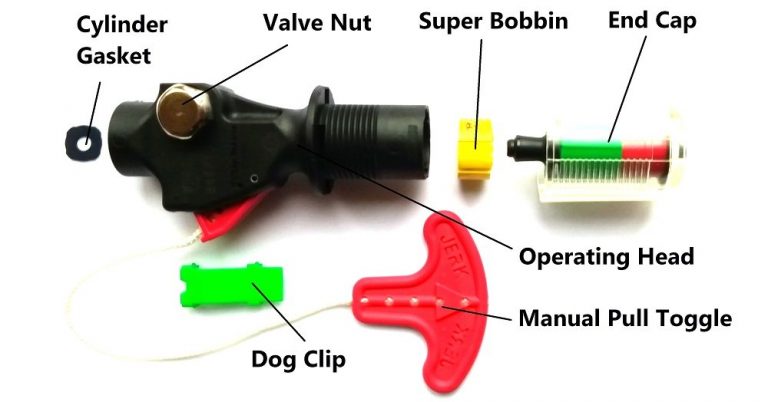
STEP 02: REMOVE THE CAP AND DISCARD THE OLD CYLINDER AND BOBBIN.
Locate the inflation mechanism that houses the bobbin and cylinder. On most of our vests, the inflation mechanism is easy to find and is located at the bottom of the inflation bladder on either the left or right side.
Remove the cap and discard the old cylinder and bobbin in the trash. Bobbins that have been exposed to high levels of humidity, heat, or vibration need to be inspected, removed, and replaced more frequently. Be sure to keep the original cap to re-install it after the process is finished.
STEP 03: GET A NEW BOBBIN.
A good thing to remember is that the average shelf life for bobbins is three to five years depending on when you purchased your inflatable. That said, you should always inspect it between each use for cracks, breaks, or deteriorations that could prevent the life jacket from inflating. Purchase a new bobbin for your re-arm kit here.
STEP 04: INSTALL A NEW BOBBIN AND CAP.
After you have disposed of the old bobbin, install the new bobbin from the re-arming kit into the gray housing. Before installing, make sure the white material in the new bobbin is not cracked or damaged. Also, be sure to check the expiration date and ensure that the bobbin has not expired. With the white facing up, drop the new bobbin into its housing after aligning it properly with the grooves.
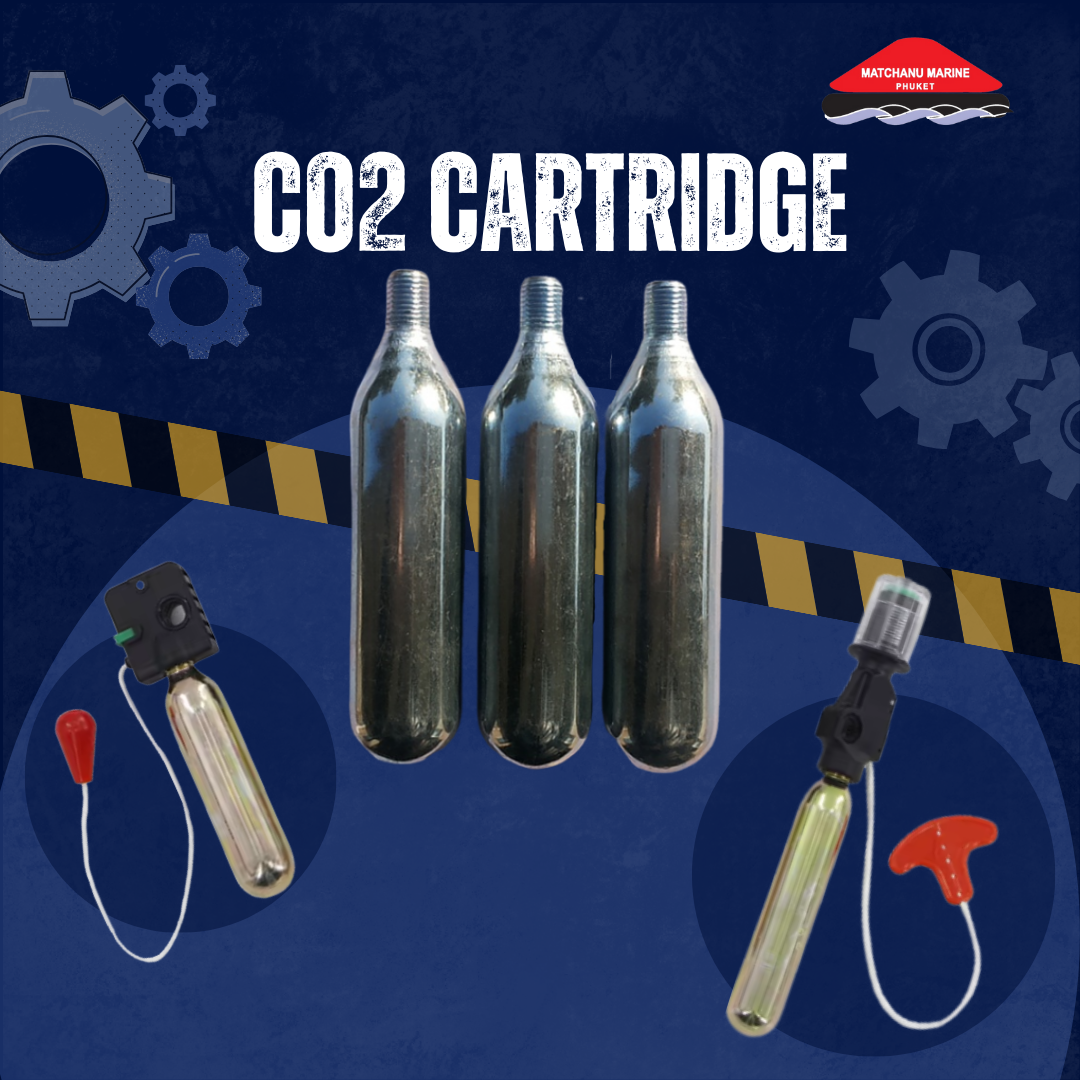
STEP 05: MAKE SURE THE NEW CYLINDER HAS NOT BEEN PUNCTURED.
After the cap and bobbin are securely installed, take the new CO2 cylinder and ensure it’s not punctured or compromised.
STEP 06: INSTALL THE NEW CYLINDER.
To install the new cylinder in its housing, turn it clockwise until snug, but do not overtighten If the cylinder is properly installed, the service indicator will show green.
STEP 07: RE-PACK THE AIR CHAMBER OR BLADDER.
Fold both sides of the air chamber into the outer shell. As you fold the air chamber, make sure not to twist it. To close the air chamber securely, press the hook and loop together on the outside edge of the shell. Once all of the bladder is in the shell, recheck that the green service indicator is shown through the indicator window on the shell.